▚Posts/DIY Visor Tinting
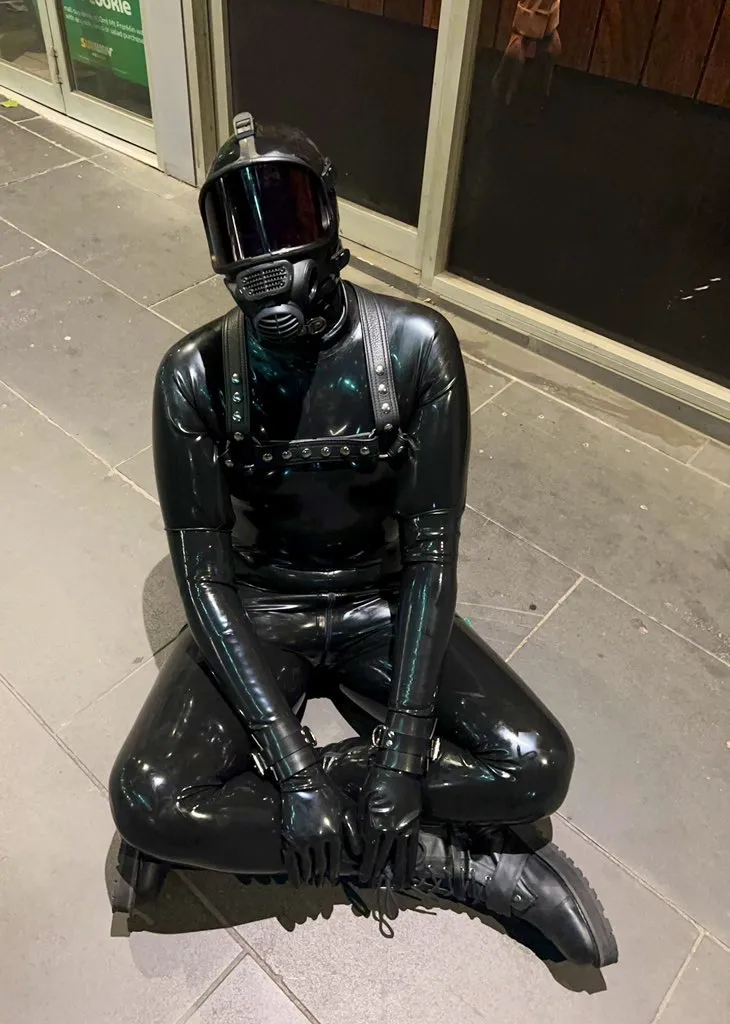
This guide covers the steps required to tint plastic visors commonly found on full face respirators using the dip-dying method. Here are my personal results from the steps in this guide:
Compatibility and alternatives
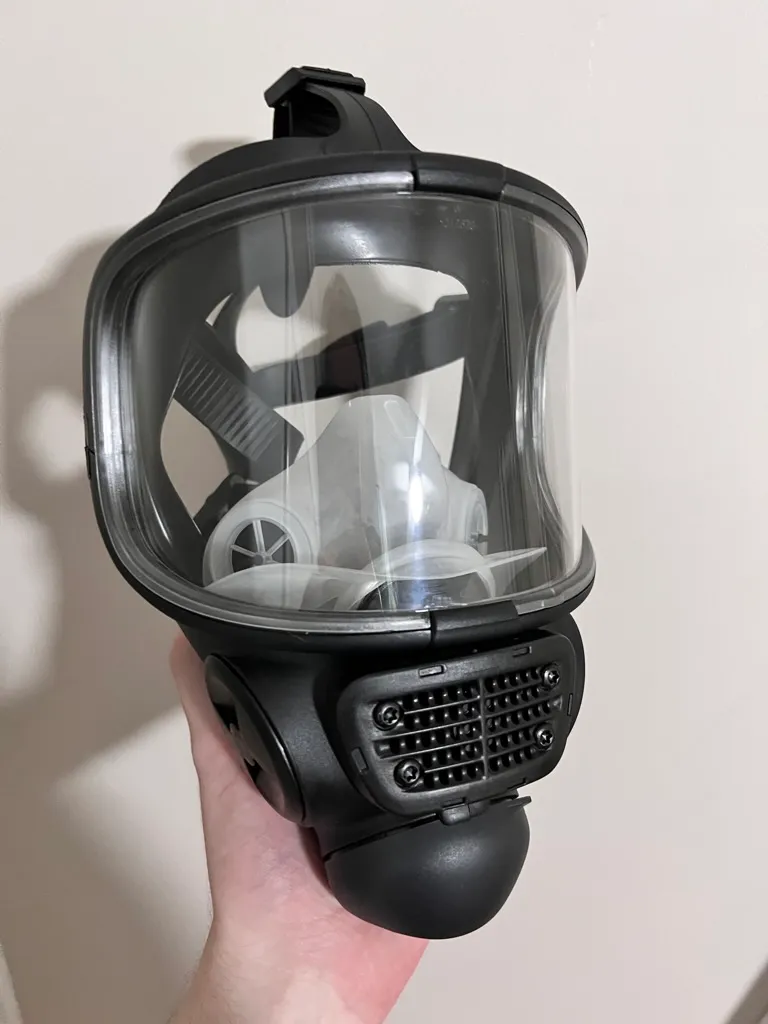
The first step is to determine if the methods covered in this post are viable for the visor you have!
If you’re looking to tint an MSA Advantage 1000 or MSA Millennium, MSA provides clip-on outserts that attach over the top of the clear visor built into the mask. If going down this route, remember to ensure the size of the outsert matches the size of your headgear, and be aware that a Millennium outsert will also fit an Advantage 1000 (with a small gap above the diaphragm).
If you’re aiming to tint another type of respirator, the main question is whether you can remove the visor by partially disassembling the unit. This modular assembly method is quite common, but some respirators are built with the visor moulded into the surrounding material. If you can take the visor out, great!
While this guide will cover the dip-dying tint method, it’s important to be aware that there are other methods that could also work for you that might be worth looking into as an alternative:
- Applying tint films to the visor. I've attempted this method, and it’s extremely difficult to get right. If your visor has wide, non-spherical curves, and no overhangs or lips, then this might be a viable alternative method.
- Spraying tint onto the visor. I’ve heard that this method works for some people, but that it requires an airbrush and specific tint paints that I don’t have any details on.
Walkthrough
Part 1 - Gathering the materials
You’ll need the following things to dye your visor:
- The plastic visor, removed from the disassembled respirator.
- A large pot, capable of holding enough water to totally cover the visor, ideally with some buffer space between the edges of the visor and the sides and bottom of the pot. This pot should not be used for food after using it for dying.
- A stove-top to boil water and create the dye solution.
- Tongs or another way of holding the visor securely by the edges with minimal contact.
- A bucket of water for rinsing
- A sacrificial towel for drying the visor after dying.
- A timer
- The dye packets! I recommend black “Idye Poly” packets by Jacquard. It’s super important to make sure the dye packets are for synthetic fabrics (the “poly” in the name), otherwise the dye may not take correctly to the plastic visor.
Part 2 - Setup
- Clean out your pot to reduce any potential contaminants that might leave leave marks on the visor during dying
- Fill the pot with water, enough that the visor can be held suspended under the water with gaps on all sides between it and the edges and bottom of the pot.
- Do some tests, holding the visor under the cold water to find an optimal way of positioning the tongs and visor without touching the edges of the pot.
- Thoroughly clean and dry the visor, making sure to remove all dirt, and water after cleaning. Any remaining water drops or contaminants might block the dye solution and create spots.
- Set the pot on a stove, set to high heat, and wait for the water to begin boiling vigorously.
- Make sure the room is well ventilated, adding the dye in the next step can smell quite bad.
- Once the water has reached peak boil, add both the dye packet, and the colour intensifier liquid that comes with it. Wait for the packet to fully dissolve, and mix the solution thoroughly for several minutes to ensure consistency is uniform.
Part 3 - Dying the visor
Dying will take place in various timed passes, I recommend 60 seconds to begin, and 30 seconds after that to ensure you incrementally darken the visor to your ideal tint level. It’s important to note that the ideal level of tinting might be lighter than you expect, hold the visor up to your face or a dark surface in order to see how it would look in context.
For each dye pass:
- Make sure the visor is dry and clean before every pass, bubbles and droplets will prevent uniform dye contact.
- Grip the visor in the tongs by the edges, minimizing contact
- Dip the visor into the dye, orienting and rotating it in a way that will trap the least bubbles. While dipping, do your best to hold the visor completely under the surface of the dye while avoiding edges and the base of the pot, which are hot-spots that could warp the plastic.
- Start the timer when you begin dipping, and gently slosh the visor around in the dye until the timer ends.
- Remove the visor from the pot, and rinse it thoroughly in the clean water bucket, making sure to dry thoroughly afterwards.
- Test the current level of the tint, taking into account the advice at the start of this section, repeat dye passes until the optimal level of darkness has been achieved.
Part 4 - Finishing up
All that’s left to do after that is reassemble your headgear, and enjoy your new faceless appearance! ✨